DIY Car Ramps
Heavy duty car ramps that let you work under or on your car at a comfortable height.
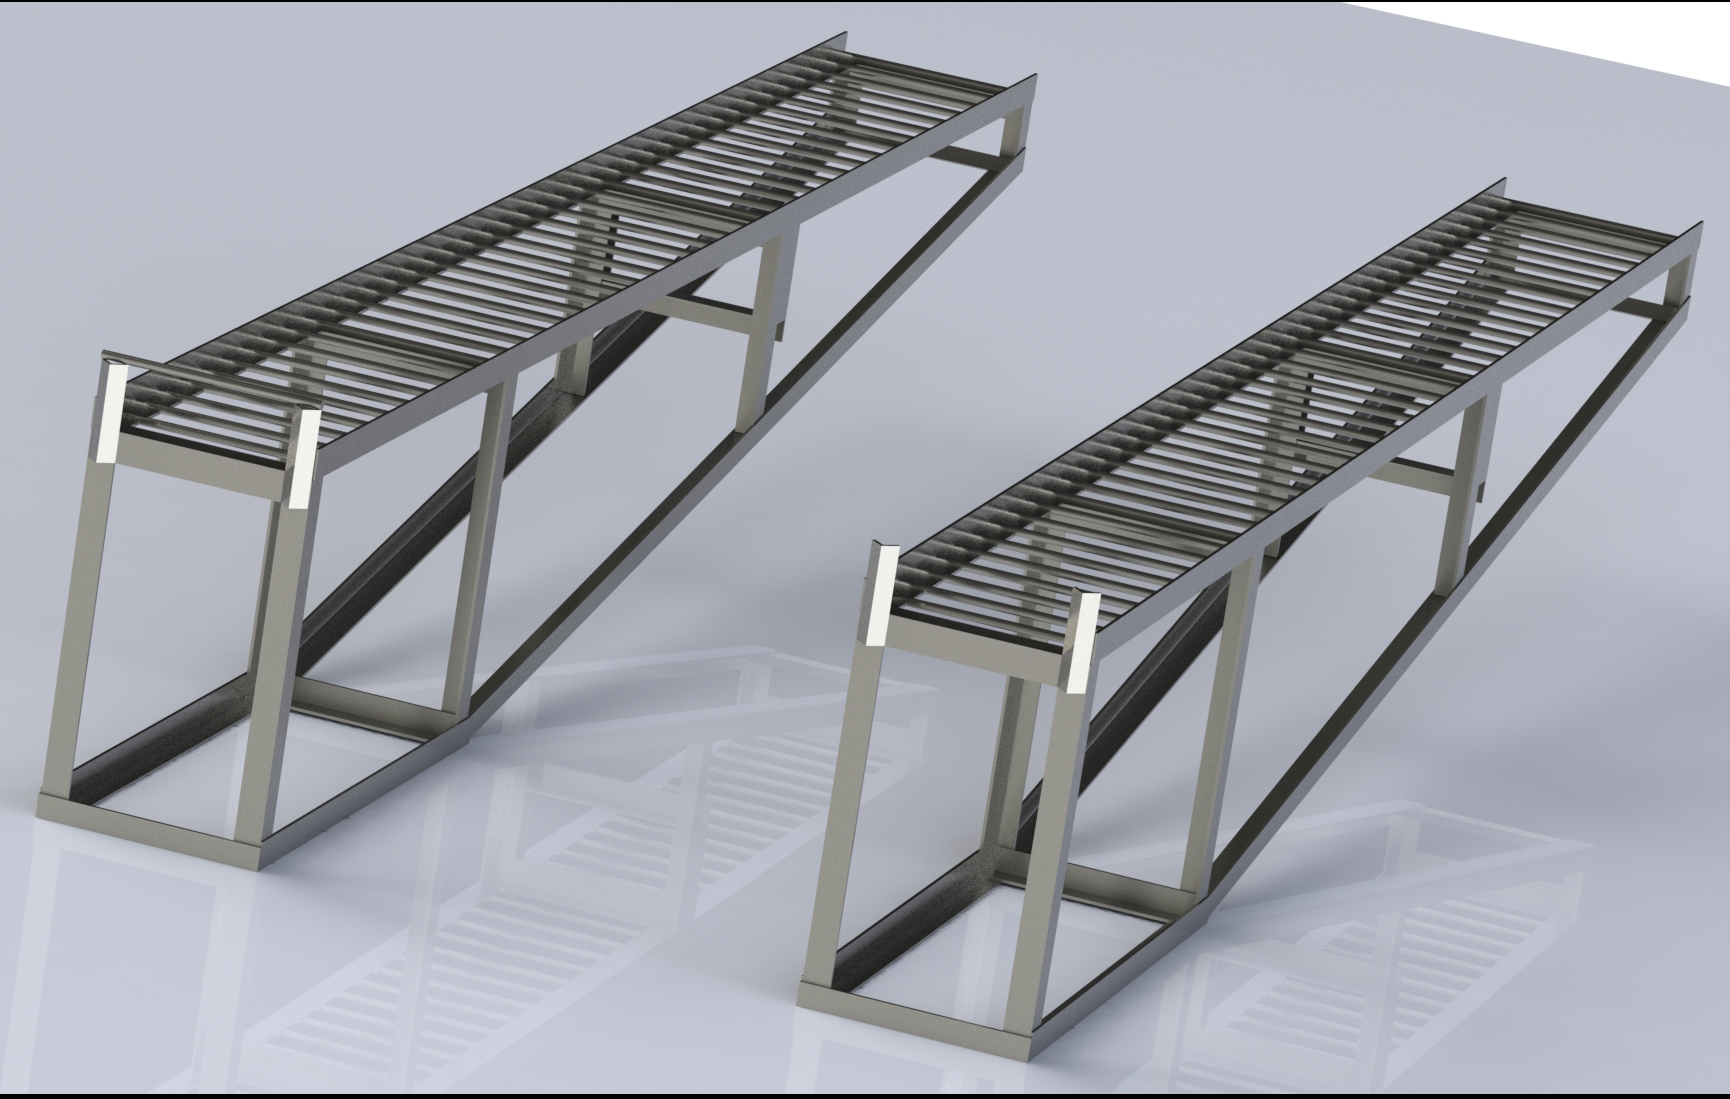
DISCLAIMER
Because I have to say it. If you build a set of these you do so at your own risk. This is just a guide, you are the master of your own destiny and it’s up to you to make sure your welds are sound and you’ve picked material suitable to the task.
When you start making these, they get heavy quickly. Ideally, you would have an engine crane or hoist at either end so you can rotate them to weld. But I didn’t and had to rely on old-fashioned strength to move them around. These will crush bones if you drop them on you.
Now we’ve got that out of the way, we can begin.
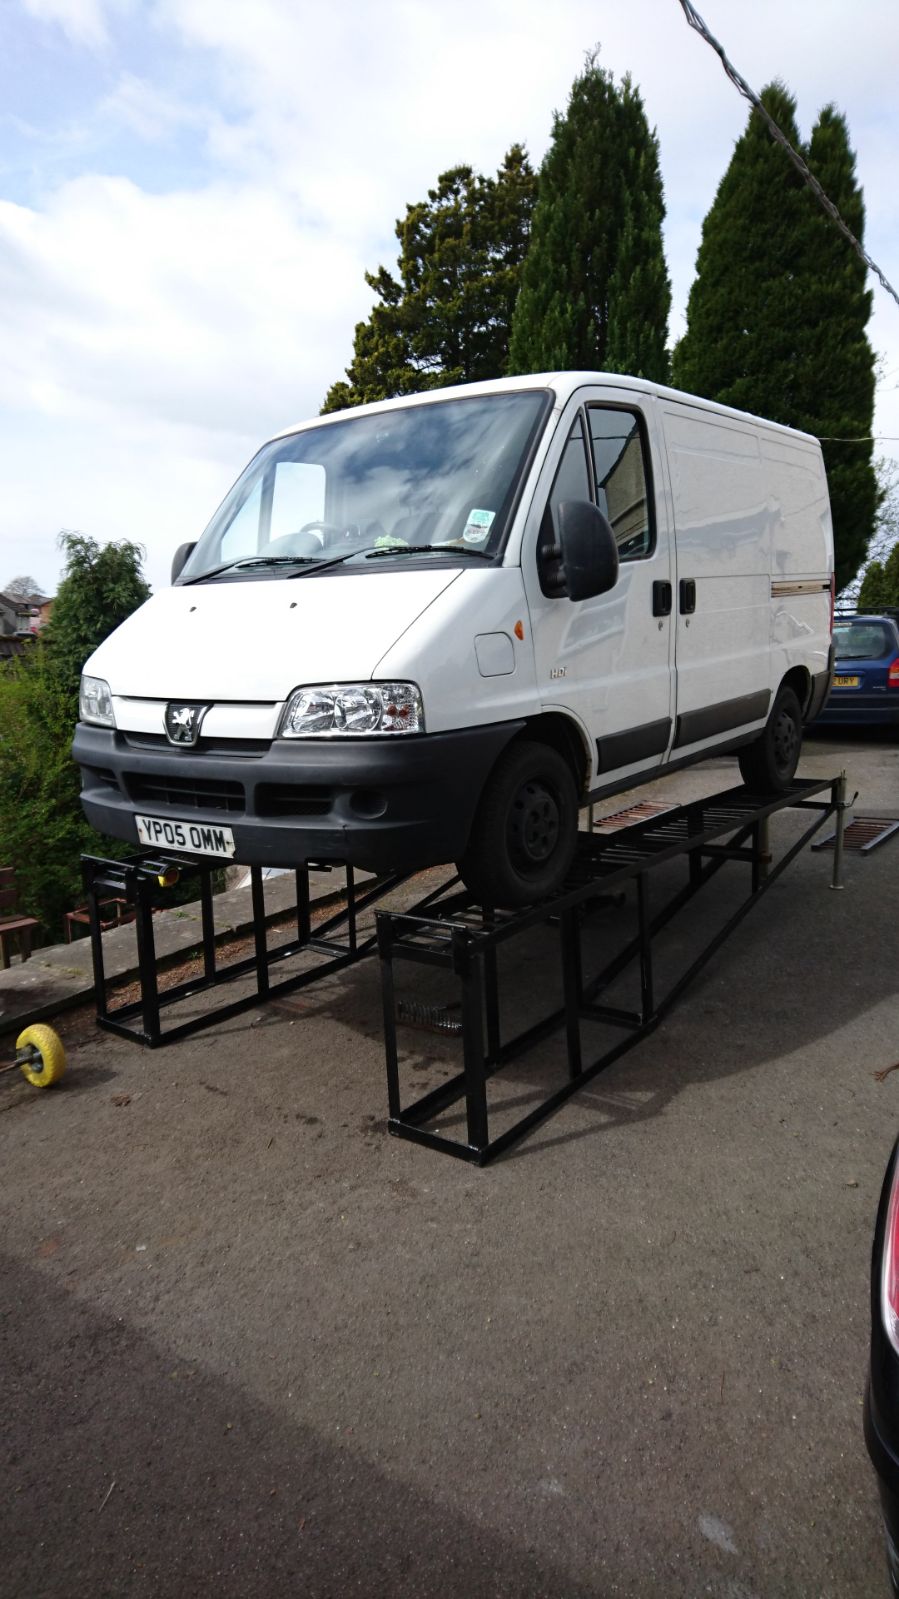
MATERIALS
My ramps are constructed from 50x50x5mm angle iron (L profile mild steel) and 16mm ribbed rebar.
There are four rear legs, these are trailer legs and can be purchased from Amazon, eBay etc.

I chose these materials as that’s what I had left over from other projects. You can substitute these for whatever you think will be suitable.
You will need approximately 48 metres of angle iron or 8 x 6m lengths.
For the rebar you’ll need around 40 metres.
But it’s always a good idea to have spare just in case you make some mistakes.
CONSTRUCTION
So I started by making the rectangular supports. They are 700mm tall and 400mm wide. These are the sections that make the front and back of rectangular part of the ramp (before the triangle part)
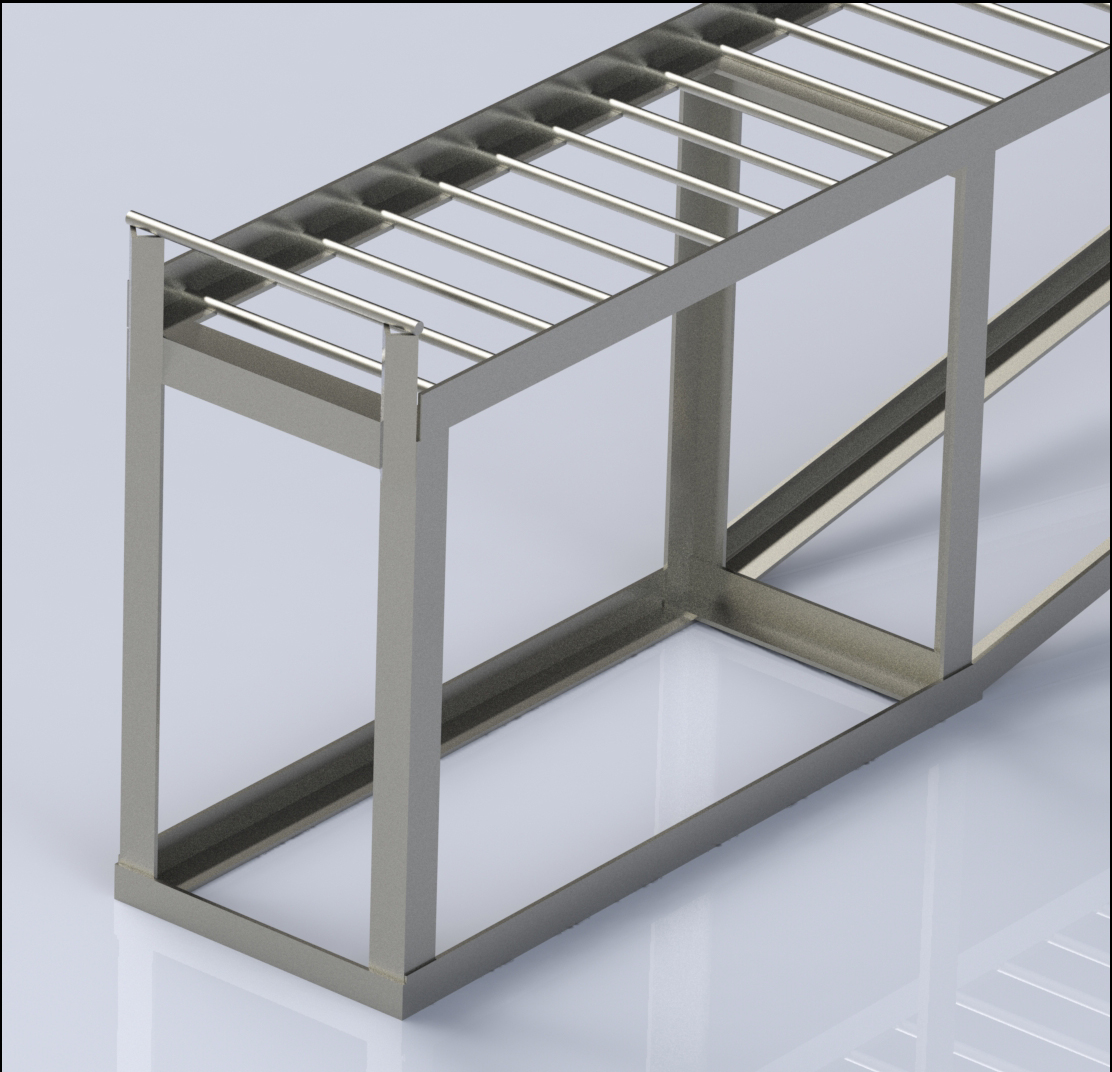
I’ve tried to have any vertical pieces sit inside the horizontal so the weight is transferred into the metal and not into the weld joint itself.
Now weld one of the rectangles to the front of the 1400mm base rails. Again sitting the rectangle inside the rail so the weight transfers. Set the rear rectangle back about 50mm from the end. This gives a space for the base of the triangle to go.
At this point, I welded on the top 4000mm sections. These sit on top of the base rectangle. Make sure you set the width at the unsupported end. I clamped them onto another piece of angle at the correct width while I welded the other end.
Now you will start to get a sense of the size of the ramps.
Weld on the two 150mm vertical pieces at the triangle end of the ramp. Remember these are square to the 4000mm lengths. This is where the main ramps meet the extension ramps.

Could you make the ramps without the extensions? Yes, they’re your ramps. But the angle will be steeper so lower vehicles might struggle to get on.

Measure the distance between the end of the short verticals and the inside edge you left on the rectangular front pieces. When you cut your angle iron it will be too long, but this is deliberate as you have to cut and angle so it fits up against the rectangular front part. It should be around 2720mm
I did it by clamping the long parts against the rectangular front parts and sitting on top of the small verticals. Then marked the angle needed and transferred it out to the end. Chop off the angles, clamp back into place and weld.
Now it’s a matter of welding on the 400mm supports at the end of the triangle section and one in the middle of the triangle where the top rails sit.
Cut and weld in the 420mm supports in the middle of the triangle making them square to the top rails.
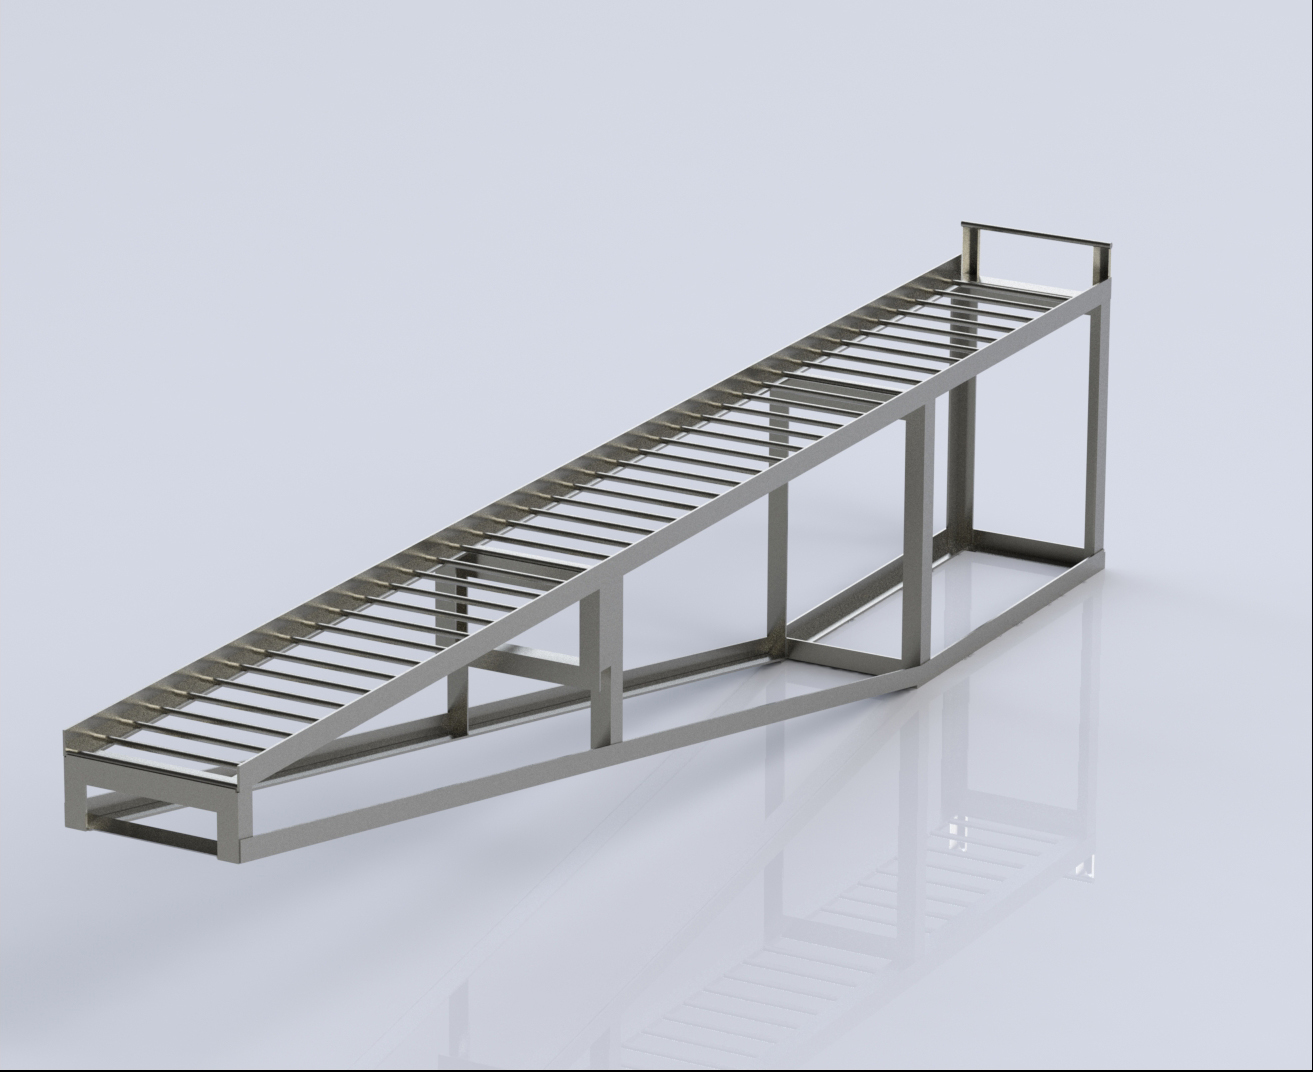
How you make the support for the jacking beam will depend on what you use for the beam. I’m using 50x50x5mm box section. The support is half way down the 420mm verticals.

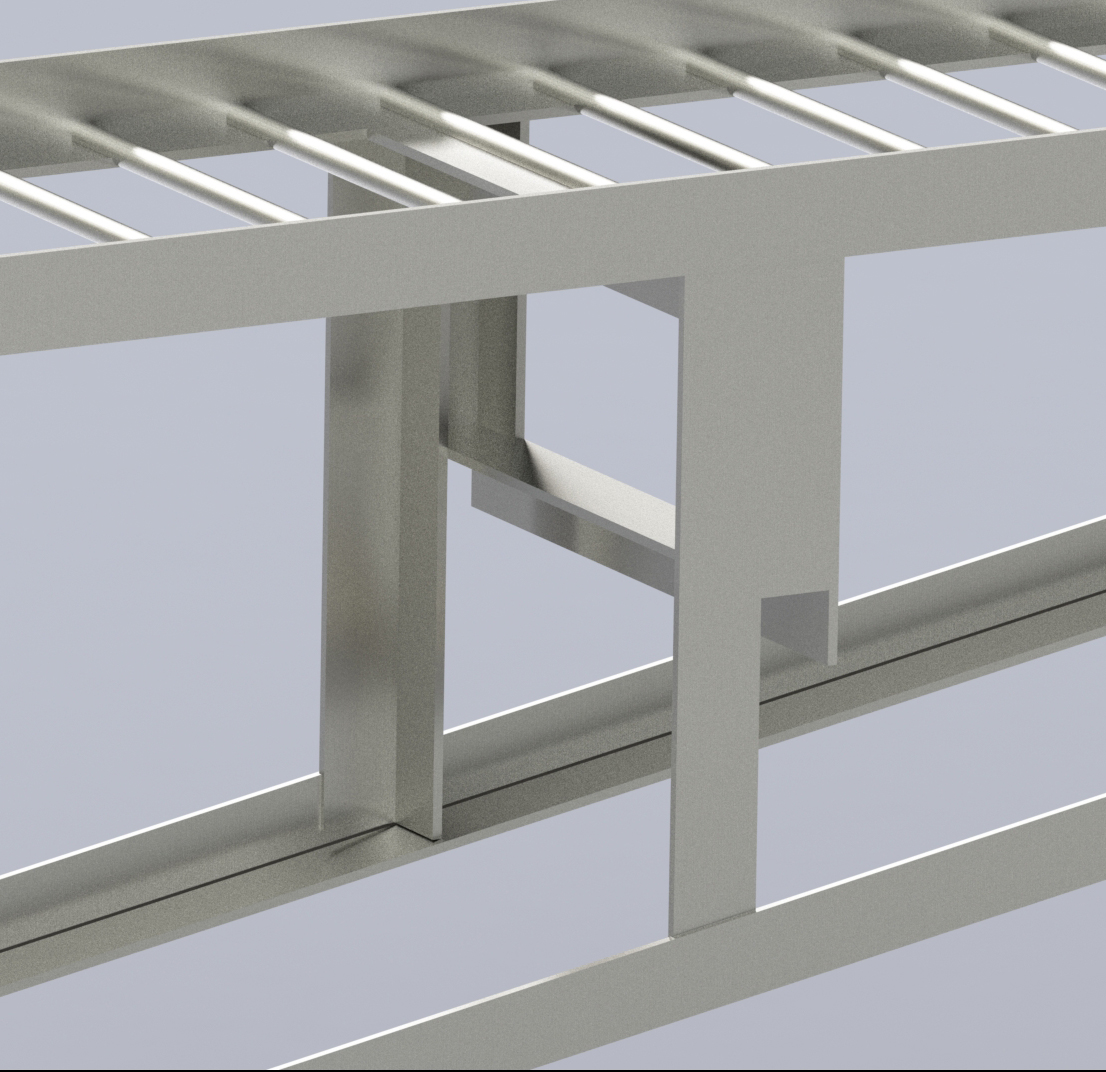
What could be more tedious than cutting forty lengths of rebar? Cutting eighty. Actually, you need another 20 for the ramp extensions as well, yes that’s a nice round 100.
Yes, you’ll need 80 x 390mm lengths of 16mm rebar (or whatever you choose). And 20 x 380mm lengths
Mark 100mm intervals along the 4000mm top rails. I found the easiest way was just to mark one side, tack all the rebars at one end, square them up and tack the other end.
When making the final weld on the rebars. SPREAD OUT. Don’t start at one end and weld each rebar in turn. You’ll put so much heat in it’ll start to warp the frame. I moved about between ramps and had a break at halfway to let them cool. I also used a full 5kg box of 3.2mm welding rods on the rebar.
They will never move.
While you’ve got your eye in on rebar welding. Now would be a good time to make the ramp extensions. Nothing fancy. Four lengths of 1000mm angle iron and twenty lengths of rebar at 380mm.

They are slightly narrower to allow them to sit on the top rails. Mark ten points 100mm apart. Weld 9 of the rebar on the inside of the angle iron. Weld the last one on the other side. This lets it hook into the top rail.

You’ll want some end stops that stop you driving a car off the end. I made mine pretty heavy duty as I want to be able to pull things up the ramps (and lower them again). But if you just need an end stop bend a bit of rebar to shape and weld it on.

If you’re using trailer legs like I have. Weld or bolt (or both) them onto the end of the ramps. Keep them square with the 4000mm top rails. You could alternatively use axle stands if they are tall enough.

I apologise if these instructions aren’t quite as clear and concise as they could be. Most of the construction was made up in my head as I was doing it.
Send me an email if you need any further information.

